
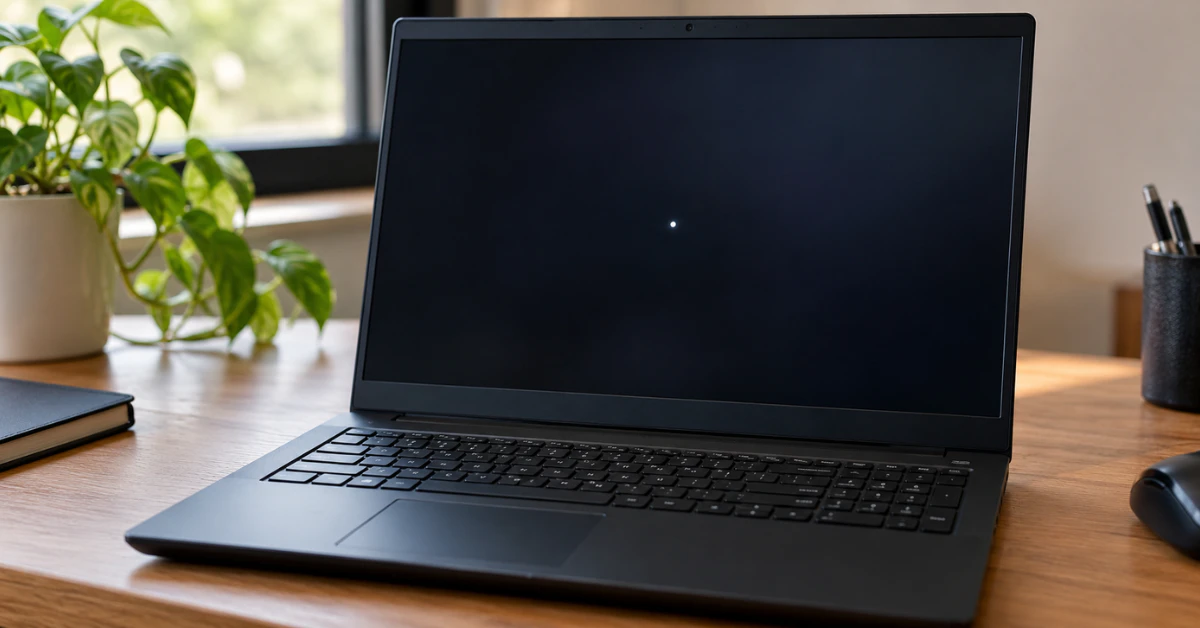
A white spot on your Lenovo laptop screen is usually one of five things: a stuck pixel, a small patch of backlight bleed, dust trapped under the panel, pressure damage, or a loose display cable. Good news first. If it is a stuck pixel, you can often fix it at home in minutes using free software, no tools or money needed. Larger glowing patches usually point to a hardware issue that needs a closer look, but that does not always mean an expensive repair.
This guide walks you through simple tests you can run right now to figure out exactly what kind of white spot you have. Once you know the cause, you will know whether it is a quick fix, a warranty claim, or something that needs a professional’s eyes on it. No guessing required.
Symptom Checker: Identify Your White Spot

Not every white spot is the same problem. The shape, size, and behavior of the spot tell you a lot before you try any fix. Look closely at yours and match it to the table below.
| What you see | Likely cause | Can you fix it yourself? |
| A tiny, sharp dot that stays the same color on every background | Stuck pixel | Yes, often fixable with free software |
| A tiny dot that stays black on every background | Dead pixel | No, usually needs a repair |
| A larger, cloudy or glowing patch, especially near an edge or corner | Backlight bleed | No reliable home fix |
| A patch that flickers or shifts position when you tilt the screen | Loose or damaged eDP display cable | No, needs a hardware check |
| A spot shaped like a smudge or blotch that appeared after something pressed on the lid | Pressure mark | Sometimes, with light and careful pressure |
| Small specks that look slightly out of focus, like a shadow | Dust or debris under the panel | No, needs professional cleaning |
| A bright area near the keyboard side of the screen with no clear edges | Possible battery pressing on the panel | No, stop using the laptop and get it checked |
A few quick notes to help you read this table correctly. Stuck pixels almost always look like a single dot, never a spread-out patch. Backlight bleed tends to show up most on dark backgrounds and near screen edges. If your spot moves or flickers only when you open, close, or tilt the lid, that is a strong sign it is not the panel itself, but the cable feeding it.
If you are still not sure which row matches what you are seeing, the next section walks you through three simple tests that will confirm it in a few minutes.
Run These 3 Free Diagnostic Tests
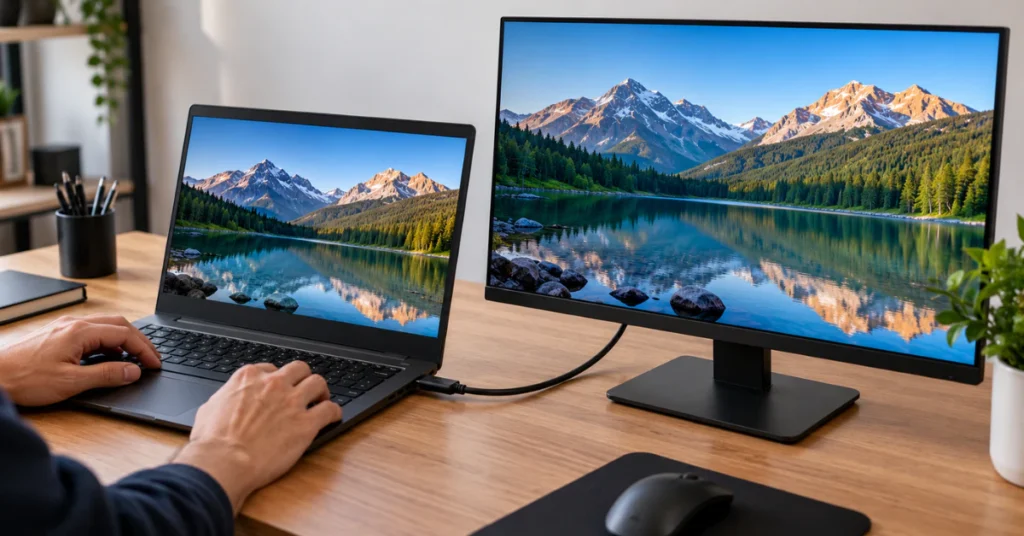
Before you try any fix, run these three tests. They take less than ten minutes total and will tell you a lot about what is really going on.
Connect to an external monitor or TV
Plug your Lenovo laptop into a TV or monitor using an HDMI or USB-C cable. Then look at that screen closely.
- If the white spot does NOT show up on the external display, the problem is with your laptop’s own screen, not the graphics card.
- If the spot shows up on both screens, the issue is more likely tied to the graphics hardware or driver, not the panel itself.
This one test alone rules out a lot of guesswork.
Boot into BIOS
The BIOS is a basic setup screen that loads before Windows starts. Restart your laptop and enter BIOS (the exact key varies by model, but it is usually shown briefly on the screen during startup).
If the white spot appears on this screen too, before Windows has even loaded, then Windows software glitches are ruled out completely. The cause is hardware, not a driver or app.
Run a Lenovo Vantage Hardware Scan
Lenovo Vantage is the official app made by Lenovo to check your laptop’s health. Here is how to use it:
- Click the Windows search bar and type Vantage.
- Open the Lenovo Vantage app.
- Click Hardware Scan, or go to Support and then Hardware Scan.
- Choose Quick Scan for a fast check, or Customize if you want to test specific parts.
- Follow the on-screen steps.
One important thing to know. Hardware Scan checks the general health and function of your display and other components. It does not detect individual pixel defects like a single stuck or dead pixel. So if the scan comes back clean, that does not rule out a stuck pixel. It just means the display hardware is talking to the system correctly overall.
You can read more about how this tool works on Lenovo’s official Hardware Scan guide.
Once you have run these three tests, you will already know a lot more than when you started. Now it is time to look at the fixes that match what you found.
The Easiest Fix (Stuck Pixels Only)
If your symptom checker pointed you to a stuck pixel, you are in luck. This is the easiest and cheapest problem to fix, and it costs nothing.
A stuck pixel happens when one tiny part of your screen gets frozen in place. Instead of changing color like the pixels around it, it stays locked on one color, often white, letting light shine through no matter what is on screen.
Here is where you need to manage your own expectations first, before you spend an hour staring at a flashing box. Software fixes only work on stuck pixels. They do nothing for these other problems:
- Dead pixels (pixels that stay black, not white)
- Cloudy or spread-out pressure marks
- Backlight bleed
- Dust under the panel
If your spot is a tiny, sharp dot and not a cloudy patch, keep reading. If it is a larger patch, skip this step. It will not help, and you will just waste time.
How the fix works
Tools like JScreenFix use a simple trick. They flash a small square of rapidly changing colors directly over the stuck pixel. This rapid cycling can sometimes “wake up” the pixel and get it working normally again.
Steps to try it
- Find the exact spot of the stuck pixel on a black background, since it shows up clearest there.
- Open a browser-based pixel fixer tool.
- Drag the flashing color box so it covers the stuck pixel directly.
- Let it run for at least 10 minutes without moving it.
- Turn it off and check the spot again on a black background.
- Repeat once or twice more if the pixel is still stuck.
This does not damage your screen and costs nothing to try. If it does not work after a couple of tries, the pixel may be permanently stuck, and you will need to move on to the next section.
The Manual “Massage” Method (With Strict Warnings)
If the software trick did not budge your stuck pixel, there is one more thing you can try before moving on to a repair. This method uses light pressure instead of software. It works for some people, but it comes with real risks, so read the warnings below before you touch anything.
Check your screen type first
This method is only for standard LCD screens. If your Lenovo laptop is a higher-end model with an OLED display, such as certain Yoga or ThinkPad X1 models, do not try this. Pressure that might help unstick an LCD pixel can permanently damage OLED panels instead. If you are not sure which type you have, check your laptop’s specs before starting.
How to do the massage method safely
- Turn off your laptop completely.
- Find the stuck pixel’s exact location using a flashlight if needed.
- Fold a soft, clean microfiber cloth so it covers your fingertip.
- Apply very light, gentle pressure directly on the spot. Think of pressing lightly on a bruise, not pushing a button.
- Hold for a few seconds, then release.
- Turn the laptop back on and check the spot on a black background.
Stop immediately if you see this
This is the part most guides skip, and it matters. If the spot changes shape, grows larger, or starts showing a rainbow or smeared color pattern while you press on it, stop right away.
That kind of change does not mean the pixel is unsticking. It means the layers inside the screen are separating from the pressure. Continuing at that point can turn a small, fixable annoyance into a cracked or permanently damaged screen.
If this happens, stop touching the screen and move on to checking your warranty and repair options in the next sections.
The Hinge Flex Test (Display Cable Issues)

If your symptom checker pointed to a spot that flickers, shifts, or comes and goes depending on how the screen is angled, you might be looking at a cheaper problem than you think. Inside every laptop hinge runs a thin ribbon cable called the eDP display cable. It carries the video signal from the motherboard up to the screen. Over time, opening and closing the lid thousands of times can wear this cable down or loosen its connection.
This matters because a worn cable is often a much simpler and cheaper fix than a full screen replacement.
How to test for it
- Turn on your laptop and find the angle where the white spot or flicker is at its worst.
- Gently tilt the lid back and forth, slowly, while watching the screen.
- Lightly press near the hinge areas on both sides while watching for any change.
If the spot changes, flickers, or moves as you do this, that points to the eDP cable, not the screen panel itself. If nothing changes no matter how you tilt or press, the cable is less likely to be the cause.
A word of caution before going further
Fixing a loose or damaged eDP cable usually means opening the laptop to reach it. Before you consider that step, you need to know this.
Opening your laptop yourself can void your remaining warranty and carries a risk of static damage. Unplug and power off first. If under warranty, use Lenovo support instead.
If your laptop is out of warranty and you want to look further, do not guess at the disassembly steps. Every model is built differently, and the wrong screw or clip can cause more damage. Search for your exact model’s official hardware maintenance manual before opening anything. This document shows the exact steps, screws, and cable locations for your specific laptop, not a generic guess.
If you would rather skip this entirely, that is a completely reasonable choice too. The next sections cover your warranty and repair options either way.
Crucial Safety Check: Is a Swollen Battery Causing the Spot?
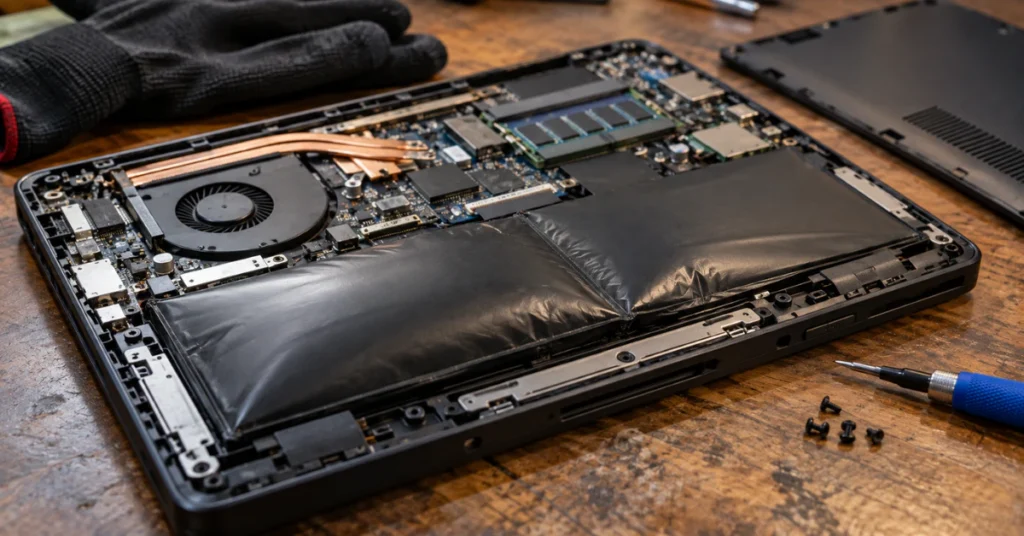
If you suspect a swollen battery (visible bulging on the chassis, the keyboard bowing up, or the laptop won’t sit flat on a table), STOP using the laptop immediately. Do not press on the screen. This is a severe fire risk. Get it professionally inspected.
Now let’s talk about why this matters here, in an article about a white spot on your screen.
This is a cause that almost nobody talks about, but it is real and it is serious. Lithium-ion batteries can swell over time, especially as they age or if they were damaged. As the battery expands, it takes up more space than it should inside the laptop’s tight frame.
In some laptop designs, the battery sits close to the back of the screen area or right beneath the keyboard deck. When it swells, it pushes outward. That pressure can travel up into the display panel itself, creating the exact kind of white or bright pressure spot this guide has been helping you diagnose.
The difference here is what caused the pressure. It is not something that pressed on the outside of your lid by accident. It is coming from inside the laptop, and it is not going to stop or get better on its own.
Signs to check for right now
- Does the bottom of the laptop rock or wobble on a flat table instead of sitting flush?
- Does the keyboard deck look puffed up or curved instead of flat?
- Do you see any bulging along the edges of the case?
If you notice any of these signs along with your white spot, this is not a screen problem you should try to fix with software or gentle pressure. This is a battery safety issue first. The screen damage is a symptom, not the main problem.
Set the laptop down, leave it powered off, and get it looked at by a professional before doing anything else described in this guide.
Pressure Damage and Backlight Bleed Explained
If you never dropped or hit your laptop, but a bright spot showed up anyway, you are not imagining things and you did not necessarily do anything wrong.
Why pressure marks spread
A laptop screen is made of several thin layers stacked together. When something presses on the lid, even something small like a pen left on the keyboard before closing it, that pressure can slightly separate these layers in one spot. Over time, especially with more use or more pressure, that separation can spread outward a little at a time. This is called delamination, and it is why a small mark sometimes grows larger over weeks or months.
Why backlight bleed changes
Backlight bleed happens when light from the LED backlight leaks out unevenly, usually near an edge or corner. This can happen because the diffuser layer, a thin sheet that spreads light evenly across the screen, shifts slightly out of place. Heat from normal daily use causes tiny amounts of expansion and contraction inside the panel. Over many heat cycles, adhesive holding these layers can loosen just enough to let the diffuser drift, which is why backlight bleed sometimes gets more noticeable over time instead of staying the same.
You may not be the cause
Here is something worth knowing if you are frustrated and confused. Lenovo has a documented history of this exact issue. Users of certain ThinkPad X220 and X230 era laptops reported bright spots appearing on their IPS displays with no physical damage at all. Lenovo repeatedly replaced these screens under warranty because it was recognized as a recurring pattern tied to that specific panel generation, not something the owners caused.
So if your spot appeared out of nowhere, that would not be the first time it has happened to a Lenovo laptop.
Does Lenovo Warranty Cover Screen Spots? (The Exact Pixel Policy)
Most guides tell you to “check your warranty” and leave it at that. Here is the actual policy Lenovo uses, with real numbers, so you know exactly where you stand before contacting anyone.
Step 1: Check your warranty status
There are two easy ways to do this.
Using Lenovo Vantage:
- Open the Lenovo Vantage app.
- Your warranty status and dates show up automatically on the dashboard. No typing required.
Using the Warranty Lookup tool:
- Find your device’s serial number or Machine Type Model, also called MTM. This is usually printed on the bottom of the laptop.
- Visit Lenovo’s official Warranty Lookup page.
- Enter your serial number or MTM.
- Submit to see your coverage dates and type.
Step 2: Understand the actual pixel policy
Lenovo bases its display warranty decisions on an international standard called ISO 9241. This standard sets rules for how many pixel defects a screen is allowed to have before it counts as truly defective, rather than just a normal manufacturing variance.
For most standard Lenovo panel sizes, here is what the policy allows before Lenovo will act:
- 0 full bright pixels allowed. If you have even 1, this counts against the panel.
- Up to 2 bright sub-pixels allowed before it counts as defective.
- Up to 5 dark sub-pixels allowed.
- Up to 5 total defective sub-pixels allowed overall.
In plain terms, a full pixel that is stuck bright is treated seriously right away. Smaller sub-pixel issues have to add up to a certain number before Lenovo’s policy kicks in.
Why this matters for you
If your white spot is a single full pixel stuck bright, and you can confirm this using the tests in the earlier sections, you may already qualify under this policy with no gray area involved. If it is smaller sub-pixel defects, you will want to count how many you can actually see and compare it against the numbers above.
This policy applies specifically to Lenovo monitors and laptop displays. Other brands, like Asus or HP, publish their own separate numbers, so do not assume these same thresholds apply if you own a different brand of device.
Frequently Asked Questions
How to get rid of white spots on laptop screen?
It depends on what type of spot you have. For a small stuck pixel, a color-cycling tool like JScreenFix can often fix it for free in about 10 minutes. For a larger patch caused by backlight bleed, pressure damage, or a cable issue, software will not help. Those need a hardware check, and possibly a warranty claim or repair.
How to fix white dot on screen?
First figure out if the dot is stuck or dead. A stuck dot shows color and can respond to a color-cycling tool that flashes rapid colors over it for several minutes. A dead dot stays black no matter the background, and software cannot bring it back. That type usually needs a repair.
Why is there a white dot on my laptop?
A few common causes exist. It could be a stuck or dead pixel, dust trapped under the display panel, a small patch of backlight bleed, or in some cases a loose display cable running through the hinge. Running the three quick tests earlier in this guide will help you narrow it down.
Why is there a white patch on my screen?
A patch, unlike a tiny dot, usually points to something bigger than a single pixel. This is often backlight bleed, pressure damage from something pressing on the lid, or in rare but serious cases, a swollen battery pushing against the back of the panel. Check the safety signs covered earlier before assuming it is only a screen issue.
How do I get rid of white patches?
Software fixes will not help here. Patches usually mean a hardware issue that needs a real inspection. Start by checking your Lenovo warranty status, since a defective panel under warranty may be replaced at no cost. If you are out of warranty, a professional repair is the safer next step.
How to fix white haze on monitor?
Haze is usually another way of describing backlight bleed. It is not something you can fix with a setting change or software tool. It comes from the way light spreads unevenly inside the panel. If it bothers you enough to fix, that means a hardware inspection and possibly a panel repair or replacement.
Final Thoughts
A white spot on your screen can feel alarming at first, but most causes are easier to sort out than they seem once you know what to look for. Run the quick tests, match your symptom to the right fix, and always put safety first if you notice signs of a swollen battery. Whether it turns out to be a simple software fix or a warranty repair, you now have a clear path forward instead of just guessing.