A black spot on your display is usually one of three things: physical pressure damage inside the screen, a dead or stuck pixel, or a software glitch. Pressure damage and dead pixels need a repair or replacement. A software glitch can often be fixed in minutes, for free.
Seeing a dark mark appear on your screen can feel alarming, especially if you don’t know why it’s there. HP’s own support documentation confirms that black spots are a known type of screen damage, often linked to a hardware issue inside the display rather than a setting you can simply switch off.
That said, not every spot means bad news. This guide walks through black spots on phone displays, laptop screens, and LCD monitors, starting with the safest and easiest checks first, before explaining when a spot points to a hardware problem that needs professional repair.
The 10-Second “Screen-Off” Diagnostic Test

Before trying any fix, there’s one quick test that tells you a lot: turn the device completely off and look at the spot again.
Here’s how to do it:
- Power down your phone, laptop, or monitor fully. Don’t just let the screen go to sleep. Hold the power button until it shuts off completely.
- Wait a few seconds, then shine a light on the screen (a phone flashlight works well) and look closely at the spot.
- Check what you see.
If the spot is still visible with the device off, that’s a strong sign of physical damage inside the panel. It may look like a crack, a dark smudge trapped under the glass, or a spot with a slightly different shine than the rest of the screen. This usually points to pressure damage or liquid getting inside the display layers, not something a software fix can solve.
If the spot completely disappears when the screen is off, but shows up again once you turn the device back on, that points to something different. This could be a dead or stuck pixel, or a display driver issue on a laptop or monitor. These problems are worth troubleshooting further, since some of them have real fixes.
This test takes less than a minute, but it saves a lot of wasted time. There’s no point spending an hour on software troubleshooting if the spot turns out to be physical damage that only a screen replacement can fix.
Is It Software? (Rule This Out First)
If the screen-off test suggests the spot might not be physical damage, don’t jump to a repair shop yet. A few software checks can rule out cheaper, faster explanations first.
Step 1: Restart the device.
This sounds too simple to matter, but it clears out temporary display glitches more often than you’d expect. Power the device fully off, wait a few seconds, then turn it back on.
Step 2: Check for a recent Windows update.
If you’re on a Windows laptop or desktop, a bad update can actually cause screen problems that look a lot like hardware failure. In January 2026, a Windows 11 security update (KB5074109) caused black screens and flickering on many systems, especially those with NVIDIA graphics cards. Microsoft later released fixes for this, including an update called KB5077181 in February 2026. If your display trouble started right after a Windows update, go to Settings, then Windows Update, and check if a newer update is available, or update your graphics driver directly through NVIDIA, AMD, or Intel.
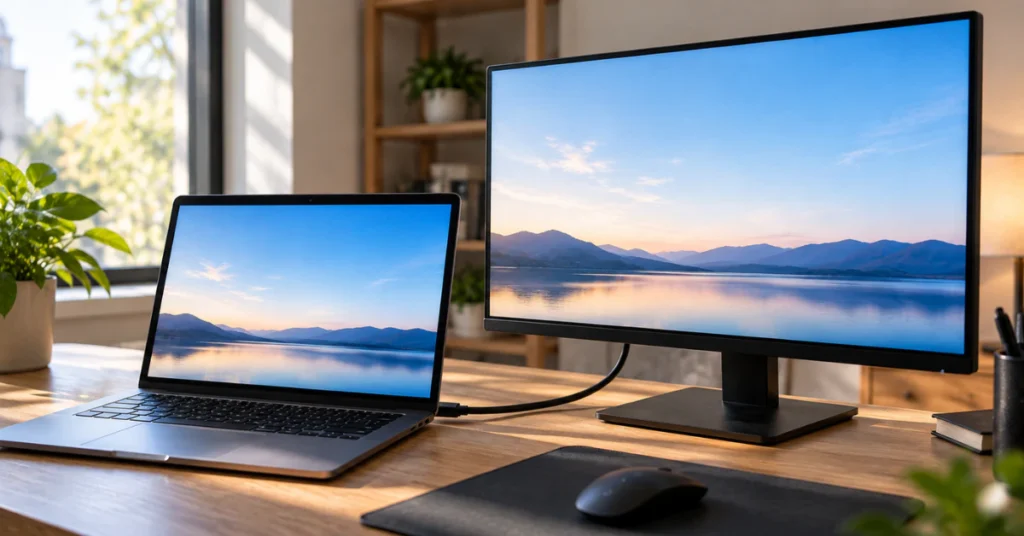
Step 3: Run the external monitor test (for laptops).
This one is especially useful if you’re not sure whether the problem is your laptop’s actual screen or something happening further back in the system.
- Connect your laptop to an external monitor or TV using an HDMI cable.
- Set the external screen as your main display.
- Look closely at the external screen.
If the black spot does not appear on the external monitor, the problem is likely with your laptop’s built in graphics or display settings, not the physical screen itself. If the spot does show up on the external monitor too, or if it only ever appeared on the laptop’s own screen and nowhere else, that points toward a hardware issue with the laptop’s panel.
These three checks cost nothing and take just a few minutes, but they can save you from paying for a screen repair you don’t actually need.
Surface Smudge vs. Internal Defect (Safe Cleaning)
Sometimes what looks like a black spot isn’t damage at all. It’s just dirt, a smudge, or a bit of grime sitting on top of the glass. Before you treat it as a hardware problem, it’s worth checking if a simple clean fixes it.
Try the cursor test first (for laptops and monitors).
Move your mouse cursor so it passes directly over the dark spot. If the cursor appears to travel in front of the mark, like it’s sitting on top of it, you’re probably looking at surface grime. If the cursor seems to disappear behind the spot, or the mark stays the same no matter where the cursor goes, that points to something underneath the glass, not on top of it.
If it looks like surface grime, clean it carefully.
Apple’s official cleaning guidance applies well here, even if you don’t own an Apple product. The safe method is simple: use a soft, lint-free cloth lightly dampened with water only, and gently wipe the screen.
Apple is clear about what to avoid. Do not use window cleaners, household cleaners, aerosol sprays, solvents, ammonia, or any cleaner containing acetone or hydrogen peroxide. Many eyeglass cleaners contain alcohol or ammonia, so check the label before using one on a screen.
Never spray any liquid directly onto the display. If it drips into the edges of the screen, it can seep inside and cause new, permanent dark spots, the very problem you were trying to clean up in the first place.
Dealing With Dead and Stuck Pixels
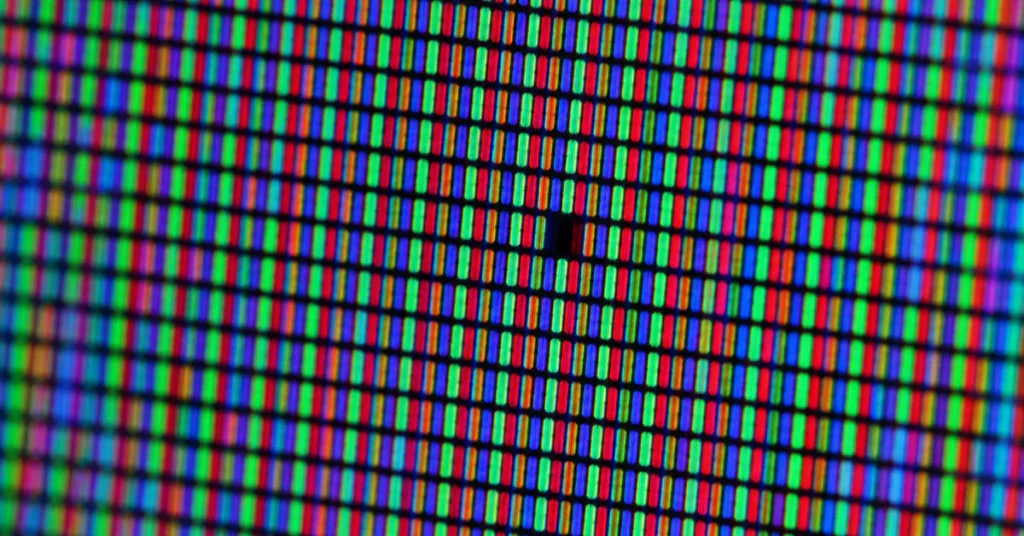
If the black mark on your screen is tiny, roughly the size of a single dot rather than a larger patch, it may be a dead or stuck pixel rather than bigger panel damage. These two things look similar but are not the same problem.
A stuck pixel is frozen displaying one color, like a tiny dot that stays red, green, or blue no matter what’s on screen. It’s technically still working, just stuck.
A dead pixel is completely unlit. It shows no color at all, even against a bright white background, and stays black all the time. This happens on iPhone screens too, not just laptops and monitors.
This difference matters because only one of these two problems can sometimes be fixed without replacing anything.
Stuck pixels can sometimes be revived with software.
Tools like JScreenFix work by rapidly flashing different colors over the stuck spot, usually for somewhere between 10 and 30 minutes. The idea is that the fast color changes can shake the pixel loose so it starts working normally again. It doesn’t always work, but it’s free to try and won’t damage your screen.
Important safety warning: These pixel fixing tools work by flashing bright colors rapidly on screen. If you or anyone nearby has photosensitive epilepsy or is sensitive to flashing lights, do not use these tools, and avoid watching the screen while someone else runs one.
Dead pixels cannot be fixed with software.
If the spot is completely black no matter what color is displayed around it, no app or tool will bring it back to life. A dead pixel means that part of the screen has lost power and stopped working for good. At that point, your only real options are living with it, or looking into a warranty claim or screen replacement, which the next sections cover.
Pressure Damage and Hardware Failure (The Ugly Truth)

A lot of people assume a black spot means they dropped their device and forgot about it, or banged it against something. That’s often not true at all.
Real reports from Apple’s and HP’s own support communities show black spots appearing with no drop, no impact, and no obvious cause at all. One Apple user described a black spot that suddenly showed up on their phone screen near the edge, with no history of dropping it. HP’s community forums have similar stories, including a dark patch that simply appeared on a laptop screen over time.
So if you’re sitting there wondering what you did wrong, the honest answer is probably nothing dramatic. Screens are more sensitive to everyday pressure than most people realize.
What actually causes this kind of damage:
- Carrying a phone in a tight pocket, where sitting down presses the screen against your leg
- Packing a laptop into a backpack that’s too full, so other items press against the lid
- Setting something heavy on a closed laptop, even briefly
- A phone getting squeezed at the bottom of a crowded bag
None of these feel like a big deal in the moment. But a screen is built from several thin layers stacked on top of each other, including a layer of liquid crystal that creates the picture you see. Steady pressure, even without a hard impact, can push these layers apart slightly or disturb the liquid crystal underneath. Once that happens, the spot usually stays, and it can sometimes get bigger over time.
A quick word on “burn-in.”
A lot of people worry that a dark mark is “screen burn,” but on most phone, laptop, and monitor LCD screens, true burn-in is rare. What people usually see on an LCD is image retention, a faint, temporary ghost of something that was on screen too long, like a paused video or a taskbar. This kind of mark usually fades on its own within minutes to a few hours, especially once you display something else on the screen for a while.
True, permanent burn-in is mostly an OLED problem, the kind of screen found in some higher end phones and TVs. If your mark fades over time no matter what’s showing on screen, it’s very likely temporary image retention, not permanent damage. If it never fades at all, you’re probably dealing with the pressure damage described above, not burn-in.
Either way, this type of damage is physical, not something caused by a setting or a bug. It is also usually permanent once it happens.
Safety Warnings: Why You Shouldn’t DIY a Broken Panel
Once you suspect a black spot is physical damage, it’s tempting to try fixing it yourself. Please read this section carefully before you do anything else.
Do not press, rub, or “massage” the spot.
There’s a popular trick online that tells people to press firmly on a black spot to push it away. This does not work the way people think it does. Pressing on the screen can push the liquid crystal underneath even further out of place, making the spot bigger or adding new damage around it. If anything, this makes the problem worse, not better.
Do not open the device yourself.
HP’s own official support documentation is direct about this: HP does not recommend repairing or replacing the screen yourself. This applies to laptops and monitors, not just HP devices. Opening the case on a laptop or monitor will almost always void whatever warranty coverage you have left, even if the device was still eligible for free repair before you opened it.
There is also a real risk of electric shock.
Monitors and laptops store electrical charge inside their internal components, even after they’re unplugged and turned off. Older monitors in particular can hold a charge in their capacitors, which are small parts that store electricity. Touching the wrong component while the device is open can result in a shock. This isn’t a risk worth taking to save money on a repair.
If the screen-off test and the checks earlier in this guide point to hardware damage, the safest next step is contacting the manufacturer or a professional repair service, which the next section covers.
The Troubleshooting and Cost-Expectation Cheat Sheet
If you’ve worked through the tests above, here’s a quick way to pull it all together. Match what you noticed to the row below.
| Symptom | Likely Cause | Is It Fixable? | Cost Expectation | Device Types |
| Spot vanishes when screen is off, returns on boot | Driver or software conflict | Yes, often free | No cost if it’s a driver or update issue | Laptops, monitors |
| Spot still visible when screen is off | Internal panel damage | No, needs replacement | Varies widely, usually a full panel or screen replacement | Phones, laptops, monitors, TVs |
| Cursor seems to go behind the spot | Internal panel damage | No, needs replacement | Varies widely, usually a full panel cost | Laptops, monitors |
| Tiny dot, frozen on one color | Stuck pixel | Sometimes, with pixel-fixing software | No cost to try | Phones, laptops, monitors |
| Tiny dot, fully black, no color at all | Dead pixel | No, software cannot fix it | May be covered under warranty, check your brand’s pixel policy | Phones, laptops, monitors |
| Mark fades after a while, especially after showing other content | Temporary image retention | Yes, usually resolves on its own | No cost | LCD screens on phones, laptops, monitors, TVs |
| Spot appears only on laptop screen, not on external monitor | Laptop panel issue | No, needs replacement | Varies, laptop panel replacement | Laptops |
| Spot wipes away with a soft, water-damp cloth | Surface dirt or smudge | Yes | No cost | All |
A quick note on cost. Repair prices change a lot depending on your device model, the type of panel inside it, your region, and whether you go through the manufacturer or a local repair shop. Rather than trust a generic price you find online, it’s worth getting an actual quote from your device’s manufacturer or a trusted local repair service. That way you know exactly what you’re dealing with before committing to anything.
If your device is still under warranty, check your manufacturer’s specific policy first. Some brands only cover a certain number of dead or stuck pixels before they’ll repair or replace a screen for free, so a single dot might not be covered even on a brand new device.
Device-Specific Next Steps (Warranty and Defect Policies)
Once you’ve confirmed the spot is hardware related, your next move depends heavily on which brand made your device. Each manufacturer handles this a bit differently, so check the section below that matches your device.
If you have an iPhone or Mac
Apple does not support fixing a black spot or delamination issue through any settings or software trick. Based on Apple’s own support community responses, the recommended path is an in-person evaluation at an Apple Store or an Apple Authorized Service Provider. Apple does not authorize or recommend swapping the screen yourself, and doing so will likely affect any remaining warranty coverage. If your black spot appeared suddenly with no drop or damage, mention that clearly during your evaluation, since this pattern is common and well documented.
If you have an ASUS laptop or monitor
ASUS follows a pixel defect standard known as ISO 13406-2, sometimes called a Class II policy. In plain terms, this means ASUS generally expects somewhere between 3 and 5 bright or dark pixel defects to show up before they consider the screen officially faulty under warranty. This can be surprising to hear, but it means a single dead or stuck pixel might not qualify for a free repair or replacement, even if the device is still under warranty. Exact numbers can vary by product line and region, so check the warranty document for your specific ASUS model, or contact ASUS support directly to confirm.
If you have an HP laptop or monitor
HP treats a physical black spot on the screen as a specific category of damage, officially called Customer Induced Damage, often shortened to CID. In practice, this means HP sees it as damage caused by handling or pressure rather than a manufacturing fault, which can affect whether it’s covered under your standard warranty. HP’s guidance points toward a full panel replacement in these cases, and clearly states that this is not something they recommend attempting yourself. If you have Accidental Damage Protection through HP, check whether it applies here, since it may change your coverage.
Frequently Asked Questions
How to fix a black spot on display?
Start with the free steps. Restart the device, check for a recent software or Windows update, and run the external monitor test if you have a laptop. If the spot is still visible with the screen off, it’s likely hardware damage, and you’ll need to check your device’s specific warranty or defect policy before booking a repair.
Why do I have black spots on my screen? / Why am I seeing black spots on my screen?
The most common cause is everyday pressure, not a dramatic drop. A tight pocket, an overstuffed bag, or something heavy resting on a closed laptop can disturb the layers inside the screen. Dead or stuck pixels and liquid getting into the display are other common causes.
How can I fix dark spots on my monitor? / How to get rid of spots on a monitor?
First, try a different cable and a different source device to rule out a connection issue. Then check if the spot is visible with the monitor fully off. If it is, that points to internal panel damage, and the fix is a warranty claim or a panel replacement, not a setting or cleaning trick.
Does LCD burn go away?
In most cases, yes. What looks like “burn” on an LCD screen is usually temporary image retention, which fades on its own within minutes to a few hours, especially once something else is shown on screen. True, permanent burn-in is mostly an OLED problem, not an LCD one.
How to remove black spots from computer screen?
It depends on whether the spot is on the surface or underneath the glass. If it’s dirt or a smudge, a soft cloth lightly dampened with water will clean it off. If the mark doesn’t wipe away, it’s beneath the surface, and cleaning won’t help since it’s a hardware issue.
Can I use eyeglass cleaner on my computer screen?
It’s best to avoid it unless the label specifically says alcohol-free and ammonia-free. Many eyeglass cleaners contain alcohol or ammonia, which official cleaning guidance warns against, since they can damage the screen’s coating over time. A cloth dampened with plain water is the safer choice.
Can black dots be removed?
It depends on the type. A stuck pixel, which is frozen on one color, can sometimes be fixed using pixel-repair software. A dead pixel, which shows no color at all, cannot be fixed with software and usually needs a warranty claim or replacement.
Conclusion
A black spot on your screen is unsettling, but it doesn’t always mean the worst. Start with the free checks: the screen-off test, a restart, and the external monitor test if you’re on a laptop. These alone can tell you whether you’re dealing with a simple software hiccup or something deeper. If it turns out to be physical damage, resist the urge to press on it or open the device yourself, and instead reach out to your manufacturer with the right information in hand. Knowing what you’re looking at is the first step to fixing it the right way.