Seeing an orange mark on your MacBook screen can feel scary, but take a breath first. Not every orange dot on MacBook screen displays means something is broken.
There are two very different problems hiding under one search term, and they look nothing alike once you know what to check.
A tiny, perfectly round orange dot in the top right corner of your screen is nothing to worry about. It is a microphone privacy light that Apple added starting with macOS Monterey. It simply means an app is using your mic right now.
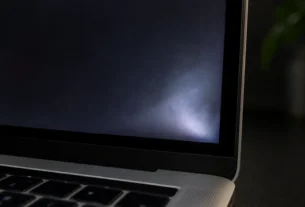
A bigger, smudgy, blotchy orange spot anywhere else on the screen is a different story. That points to a hardware problem, often pressure damage to the display itself.
So which one do you have? Let’s walk through how to tell the two apart in under a minute.
Dot vs. Spot: Which Do You Actually Have?

Check the top right of your screen, right next to the Control Center icon. If you see a small orange dot there, your Mac is simply telling you an app is using your microphone right now. That’s it. It is not a glitch and not damage.
Only one privacy dot shows at a time. If you see green or purple instead of orange, that means a camera is active instead of a mic. Your Mac picks the most relevant color to show you, so you will never see two dots stacked on top of each other.
Here’s a fact that trips a lot of people up. Apple TV uses the opposite color logic. On a MacBook or iPhone, orange means the microphone is active. But on Apple TV, an orange dot means the camera or microphone is connected but not active, while green means it is in use. If you searched for “orange dot on screen apple tv” expecting it to work like your Mac, that’s why the colors felt backwards.
Now, for the bigger picture. Use this table to quickly match what you’re seeing to the right explanation.
| Cause | How to Tell | Fix | Cost |
| Privacy dot (software) | Tiny, round, sits only in the top right corner near Control Center | Nothing to fix, it’s a built-in feature | Free |
| Pressure spot (hardware) | Larger, blotchy, appears anywhere on screen, often worse on dark backgrounds | Apple Diagnostics, then possible repair | Varies by damage |
| Staingate coating damage | Smudgy or streaky patches, mostly on older Retina MacBooks | Apple repair assessment | Varies, program mostly expired by 2026 |
The Zero-Cost “Screenshot Test”
Before you spend a dime, try this simple trick. It takes less than a minute and tells you a lot.
Press Command + Shift + 3 to take a full screen screenshot. Open the image in the Photos app and zoom in on the area where you saw the orange spot.
Here’s why this works. A screenshot only captures what your software is telling the screen to show. It cannot capture anything caused by the physical glass or display panel itself.
So look closely at the picture. If the orange blotch shows up clearly inside the screenshot, the problem is coming from software, maybe a rogue app or a display glitch. That’s actually good news, since software problems are usually much easier and cheaper to fix.
But if the screenshot looks completely clean, with no orange anywhere in the image, while the spot is still sitting right there on your actual screen, that tells you something different. It means the damage is physical, built into the display hardware itself, not something your software is drawing.
This one test can save you from guessing and from paying for diagnostics you may not even need.
Run Built-In Apple Diagnostics

Your MacBook actually has a free diagnostic tool built right into it. You don’t need to download anything or pay a technician just to get a first opinion.
Here’s how to start it. If you have an Intel Mac, shut down your computer, then turn it back on while holding Command + D. If you have an Apple Silicon Mac, shut down, then press and hold the power button until the startup options appear. You can also run it online through Apple’s self-service diagnostics page if you prefer.
Once it loads, pay attention to two specific tests. The first is called Display Anomalies. This one is built to catch pixel problems and strange patterns on your screen, exactly the kind of thing that causes an orange spot. The second is the Mac Resource Inspector, often shortened to MRI, which checks your hardware more broadly.
Run both tests and wait for the results. If either one flags a display fault, you now have official, system-confirmed proof that something is physically wrong with your screen. That is incredibly useful information to bring with you if you end up booking a Genius Bar appointment, since you won’t be relying on guesswork or a verbal description alone.
You can find full setup instructions on Apple’s official diagnostics support page.
Software Resets (And the Apple Silicon Reality)
You’ve probably seen advice telling you to “reset the SMC and NVRAM” to fix display problems. Before you spend ten minutes hunting for a key combination, there’s something important to know first.
If you have an Apple Silicon Mac, meaning one with an M1, M2, or M3 chip, this advice simply does not apply to you. These newer Macs don’t have a manual SMC or NVRAM reset at all. There is no secret key combo to hold down. The entire feature works differently under the hood now.
So what do you do instead? Just shut your MacBook down completely, wait a few seconds, then turn it back on. That’s it. A normal restart on an Apple Silicon Mac does the same job that the old reset combos used to do on older machines. You’re not missing a step. You’re not doing it wrong. The restart alone covers it.
Things are different if you’re on an older Intel Mac. Those models do still use the classic key combinations for SMC and NVRAM resets, and if you’re not sure which chip your Mac has, you can check under the Apple menu by clicking “About This Mac.”
Here’s why this matters for your orange spot specifically. A lot of guides online tell every single reader to go through the full SMC and NVRAM reset dance, no matter what Mac they own. If you’re on an Apple Silicon machine and you follow those old steps, you’re not fixing anything, you’re just wasting time chasing a feature that no longer exists on your computer. A simple restart gets you the same result in seconds, and then you can move on to figuring out whether your orange spot is truly a hardware issue.
Identifying Physical Screen Damage

So the screenshot test came back clean, but the spot is still sitting right there on your screen. That confirms it. You’re dealing with physical damage, not a software glitch. Let’s talk about what actually caused it.
Pressure Spots
This is the most common cause of an orange spot on screen MacBook Pro and MacBook Air users run into. It usually happens one of two ways. Either something heavy was pressing against the closed lid inside a backpack or bag, or the keyboard and trackpad pressed into the screen when the laptop was shut, often because of grit, dust, or just normal pressure over time.
Here’s what’s actually happening underneath the glass. Your screen has an LCD layer that displays the image, with a backlight shining through it from behind. When that layer gets squeezed or deformed, even slightly, light starts leaking through unevenly in that spot. That leak often shows up as an orange or yellow tint, especially noticeable against dark backgrounds, since there’s nothing else bright enough to hide it.
Staingate (Coating Damage)
You may have come across old forum posts talking about “Staingate,” a known issue where the anti-reflective coating on certain Retina MacBooks wears off or peels, leaving smudgy, stained looking patches. Years ago, Apple ran a free replacement program for this.
Here’s the honest update for 2026. That program only ever covered machines within 4 years of their original purchase date, and it applied to specific older models. That window has now closed for every single model that was ever eligible. If your MacBook is affected by coating damage today, you should not expect a free fix under that old program, unless your laptop happens to be brand new and still well within its very first year of ownership. For anything older, you’re looking at a paid repair assessment instead.
Safety & Warranty Warning: What NOT to Do
You might have seen other blogs suggest pressing on the spot, rubbing it with a cloth, or even using a hairdryer or ice pack to “fix” it. Please don’t try any of these.
Pressing or rubbing the spot can turn a small cosmetic blemish into permanent, dead pixel clusters that never come back. What looks like a minor annoyance right now could become a much bigger, darker patch if you mess with it.
Heat is even riskier. A hairdryer or any other heat source near the screen can damage the battery sitting just underneath, since MacBooks pack their components tightly into one sealed unibody. This isn’t a case where a little extra warmth speeds up a fix. It just adds a second problem on top of the first one.
And here’s something just as important. Your MacBook’s display assembly is sealed shut. Opening it yourself, even carefully, will instantly void whatever is left of your Apple Limited Warranty or AppleCare+ coverage. That means if something goes wrong during a DIY attempt, you lose your safety net completely and end up paying full price out of pocket for a screen that might not have needed full replacement in the first place.
Repair Options and Genuine AppleCare+ Costs

Once you know it’s a hardware issue, your next move is booking a Genius Bar appointment or visiting an Apple Authorized Service Provider. Let’s talk numbers so you’re not caught off guard.
If you have active AppleCare+, the good news is your repair comes with a set service fee instead of a full retail price. For screen or enclosure damage, that fee runs between $49 and $99. If the damage falls under the broader “other accidental damage” category, like a liquid spill that caused the spot in the first place, you’re looking at $149 to $299 instead. These numbers are based on Apple’s own 2026 pricing, so you can budget with confidence before you even walk into the store.
Now, if you don’t have AppleCare+, or if your MacBook is past the standard one-year hardware warranty, the picture changes. Without that coverage, a full screen replacement can cost significantly more, often several hundred dollars, since you’re paying the full repair rate rather than a discounted service fee.
Here’s a smart move before you commit to anything. Ask for a free diagnostic quote at the Apple Store first. They’ll confirm exactly what’s wrong and give you a real number based on your specific MacBook model, rather than you guessing based on general pricing ranges. That way you know precisely what you’re paying for before any work begins.
You can check your current coverage status anytime on Apple’s official support page.
The “Orange Screen of Death” Myth
While searching for help, you may have stumbled across articles about the “Orange Screen of Death” and felt a fresh wave of panic. Here’s some relief. You can skip those entirely.
That term doesn’t belong to MacBooks at all. It actually comes from two completely different worlds: Nintendo Switch consoles freezing up during gameplay, and Windows PCs crashing due to graphics card errors. Neither one has anything to do with Apple or macOS.
So if your MacBook’s entire screen turns solid orange, you’re not cursed with some mysterious “Screen of Death.” You’re dealing with a serious but standard display or graphics issue, and it calls for the same steps already covered here, like running Apple Diagnostics, not Nintendo Switch reset tricks or Windows driver fixes that were never built for your machine.
Frequently Asked Questions (FAQ)
How do I get rid of the orange dot on my MacBook?
If it’s the small dot in the top right corner, you can’t remove it. It’s a built in privacy feature that shows whenever an app uses your microphone, and Apple doesn’t offer a setting to turn it off.
Why is there an orange spot on my laptop screen?
A bigger orange spot is usually caused by pressure damage, often from something pressing on the lid inside a bag, or the keyboard pressing into the screen when closed. On older Retina MacBooks, it can also come from Staingate, a known anti-reflective coating failure.
What does the orange dot mean on my Mac?
It means your microphone is currently in use by an app. This privacy indicator has appeared next to the Control Center icon since macOS Monterey.
How to get rid of the orange screen of death?
This term doesn’t apply to Macs. It refers to Nintendo Switch freezing errors and Windows PC graphics card crashes.
What does the orange Screen of Death mean?
Same answer as above. It’s a Nintendo Switch and Windows specific term with no real meaning on macOS.
How to fix the orange screen of Death Switch?
This question is about the Nintendo Switch console, not a MacBook. Switch reset tricks won’t help a Mac, since the two devices don’t share this kind of error.
Conclusion
An orange mark on your MacBook screen doesn’t have to be a mystery. A tiny dot in the corner just means your mic is active, and there’s nothing to fix. A bigger spot means physical damage, and now you know exactly how to confirm it with the screenshot test and Apple Diagnostics, what it costs to repair, and what to avoid so you don’t make things worse. Whatever you’re dealing with, you can walk into your next step with a clear answer instead of a guess.