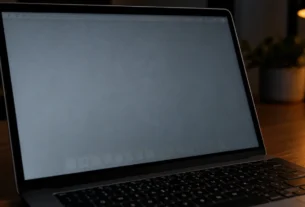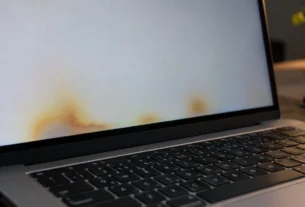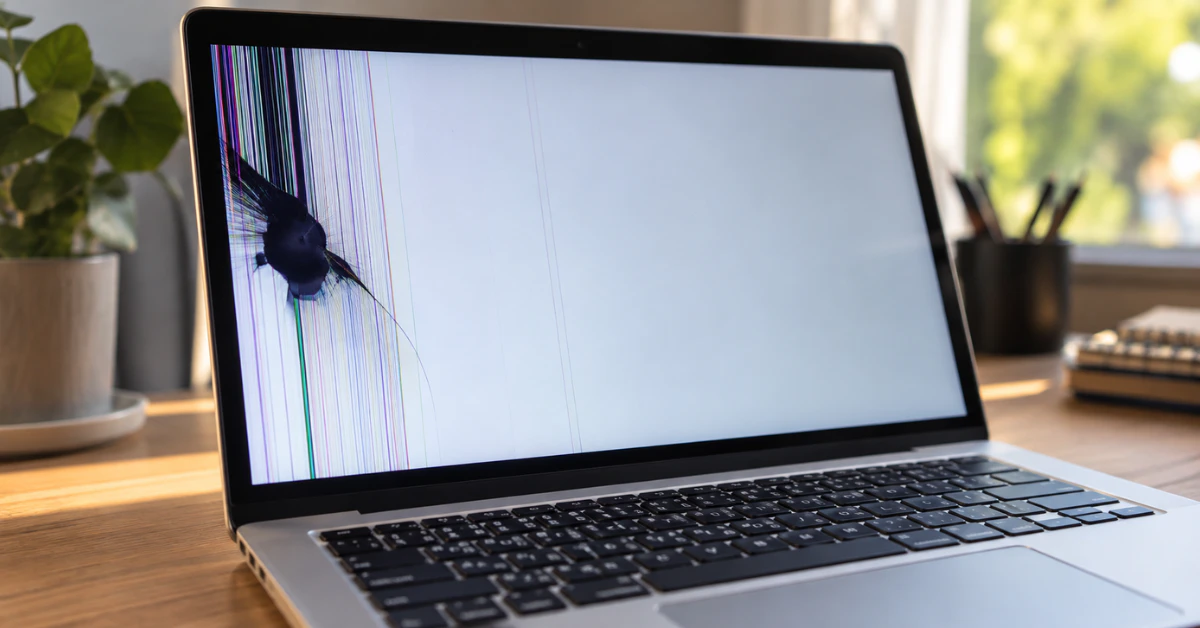
MacBook screen pressure damage happens when something squeezes or presses the display hard enough to crack or bruise it from the inside. You’ll see a dark blotch, colored lines, or a bright spot that stays put no matter what’s on the screen. It’s physical damage, not a software glitch, so no update or restart will fix it.
If you just noticed this, don’t panic, but do act. Stop pressing on the screen and try not to open and close the lid more than you have to. The crack or bruise can spread with more movement. While the screen still works, even partly, back up your files right away. This buys you time to figure out your next step without losing anything important.
How to Identify MacBook Screen Pressure Damage
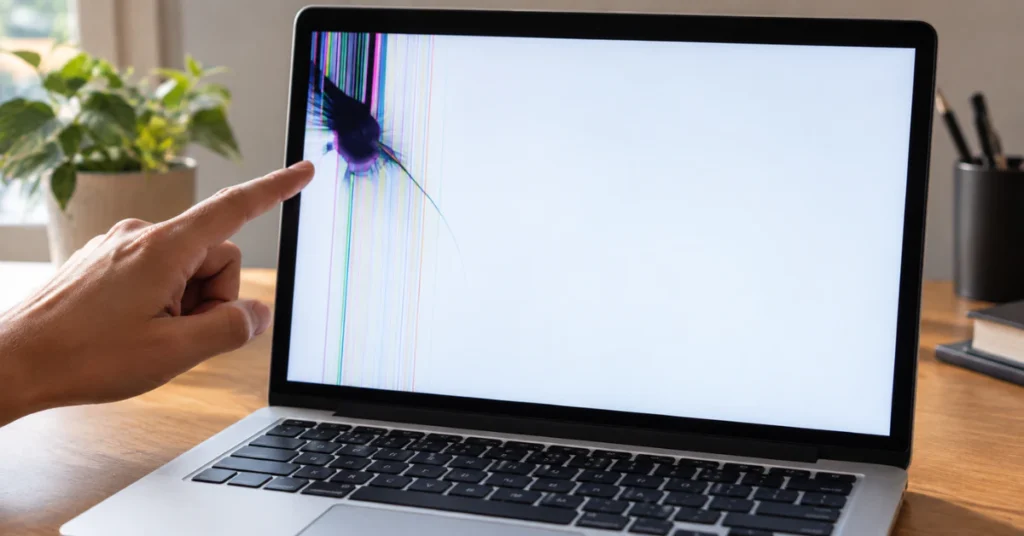
Before you assume the worst, run a few quick checks. These won’t fix anything, but they’ll tell you what you’re actually dealing with.
Check plain backgrounds
Open a few full-screen colors. Try plain white, plain black, plain red, and plain blue. You can do this by opening a blank document and filling the screen with color, or using any solid-color image.
Watch the mark closely. If it stays in the exact same spot no matter what color is behind it, that points to the screen itself. If it only shows up with certain apps or content, it might not be the panel at all.
Take a screenshot
Take a screenshot of the damaged area and look at it on your phone or another computer. A screenshot captures what your Mac is sending to the screen, not what’s physically wrong with the glass. If the mark shows up in the screenshot too, the problem may be happening somewhere other than the display itself.
Plug in an external monitor
Connect your MacBook to an external monitor or TV. If the picture looks totally normal on the external screen while the built-in display still shows the mark, that’s a strong sign the damage is in the MacBook’s own screen.
The “tilt it and it disappears” trap
Here’s something worth knowing before you book a repair. Some MacBook owners have reported that their lines or glitches partly vanish, or change shape, when they tilt the screen to a certain angle. This has shown up often enough in online forums to be worth mentioning, especially on models going back to 2021 and earlier.
Apple hasn’t confirmed this as an official issue, so treat it as anecdotal, not fact. But if your symptom changes with the angle of the lid, it may point to a loose or strained internal display cable rather than a cracked or bruised panel. That’s a different problem with a different fix, and it’s worth telling your repair technician exactly what you noticed, since it could change what they check first.
The Common Causes (Beware the 0.1mm Rule)
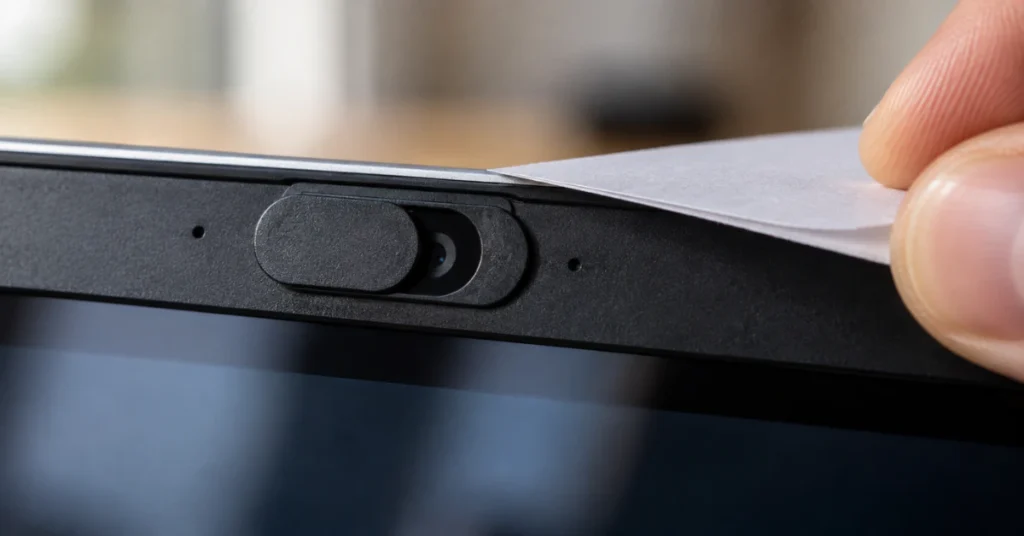
A MacBook’s lid closes with almost no space between the screen and the keyboard. That tight fit makes the laptop thin and light, but it also means even a small object can cause big trouble.
Common culprits include:
- A pen, earbud, or USB cable left on the keyboard
- Crumbs or small debris stuck near the keys
- A tightly packed backpack or bag pressing on the closed lid
- Another item, like a book, stacked on top of the laptop
Any of these can press hard enough into the screen to crack or bruise it from the inside, even if the outside glass looks perfectly fine.
The 0.1mm rule most people don’t know about
There’s one cause that trips up a lot of MacBook owners: webcam privacy covers. According to Apple’s own support page, any cover left over the camera must be no thicker than 0.1mm, about the same thickness as a single sheet of printer paper. If your cover is any thicker than that, you need to take it off before closing the lid.
Here’s the problem. Most webcam covers sold online, the kind you’d find on Amazon or Walmart, are much thicker than Apple allows. Many of these slide-style covers measure between 0.5mm and 0.7mm, which is five to seven times over Apple’s limit.
If you’ve been closing your MacBook with one of these covers in place, you may have been putting pressure on your screen every single day without realizing it. It’s an easy mistake to make, since these covers are marketed as laptop-safe and sell by the thousands.
The fix is simple going forward: either slide the cover open before closing the lid, or switch to a cover thin enough to meet Apple’s spec. See Apple’s official guidance here.
Why a “Reset” Won’t Fix Pressure Damage
If you’ve been searching for a MacBook screen pressure damage reset, you’re not alone. It’s one of the first things most people try, and it makes sense. Resets fix so many other Mac problems, so why not this one?
Here’s the honest answer: a reset can’t touch this kind of damage, and it never will.
An SMC reset clears your Mac’s power and hardware settings. An NVRAM or PRAM reset clears small bits of saved data like volume level and screen resolution. Even a full factory reset just wipes your software and starts your operating system fresh. None of these touch the physical screen itself.
Pressure damage is different because it’s not a software problem at all. When something presses too hard on a closed lid, it can crack the glass layer, bruise the liquid crystal material inside the panel, or bend a tiny internal cable that connects the screen to the rest of the computer. These are physical, mechanical injuries to real parts.
Think of it like a cracked phone screen. No amount of restarting your phone will make the glass smooth again. The same logic applies here. A reset can only change what’s stored in memory or settings. It has no way to reach inside the display and fix bent metal or fractured glass.
If a reset hasn’t helped by now, that’s not because you did it wrong. It’s because this problem was never something software could solve in the first place.
Pressure Damage vs. Water Damage (And What To Do)
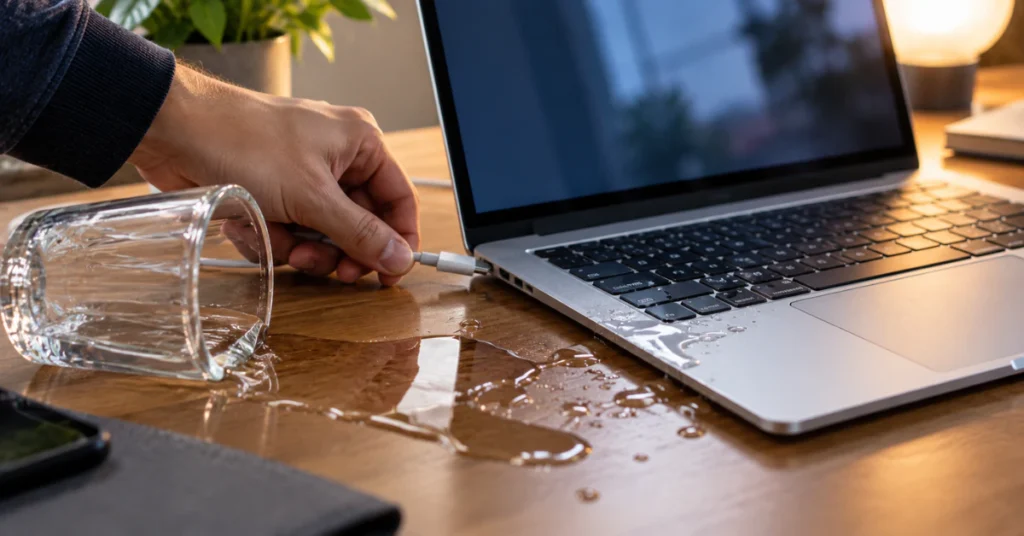
Sometimes it’s hard to tell if your screen trouble came from pressure or from liquid. The two can look similar at first, with lines, dark spots, or strange flickering. But Apple treats them differently, and that difference affects your wallet.
How Apple checks for liquid damage
Every modern MacBook has small parts inside called Liquid Contact Indicators, or LCIs. These are tiny stickers that change color, usually to red, if they come into contact with liquid. When you bring your MacBook in for repair, a technician checks these indicators. If one has triggered, Apple will usually classify the repair as liquid damage, even if the visible symptom looks like pressure damage, and even if you’re sure no spill happened.
This matters because liquid damage is not covered by Apple’s standard one year warranty or the basic AppleCare Protection Plan. You’ll be looking at an accidental damage fee instead.
A newer warning system, but only on some models
If you have a newer MacBook, running macOS Sequoia or later, your Mac might actually warn you about liquid before you even see screen trouble. This alert appears on MacBook Air with M3, M4, or M5 chips, and MacBook Pro with M3 Pro, M3 Max, or newer chips. It watches the USB-C port and warns you if it detects liquid there.
If you have an older MacBook, including Intel models or early M1 and M2 machines, you won’t get this alert at all. No warning doesn’t mean no liquid got in. It just means your model doesn’t have this particular feature.
If you suspect liquid got in, do this
Shut your MacBook down right away and unplug it from power. Then follow Apple’s safety guidance closely:
- Don’t dry your Mac using an external heat source or compressed air.
- Don’t insert a foreign object, such as a cotton swab or a paper towel, into the port.
- Don’t put your Mac in a bag of rice. Doing so could allow small particles of rice to damage your Mac.
Instead, leave it powered off in a dry spot with some airflow, and get it looked at by Apple or a trusted repair shop as soon as you can. Apple’s official liquid damage guidance is here.
Repair Costs, AppleCare+, and the Insurance Myth
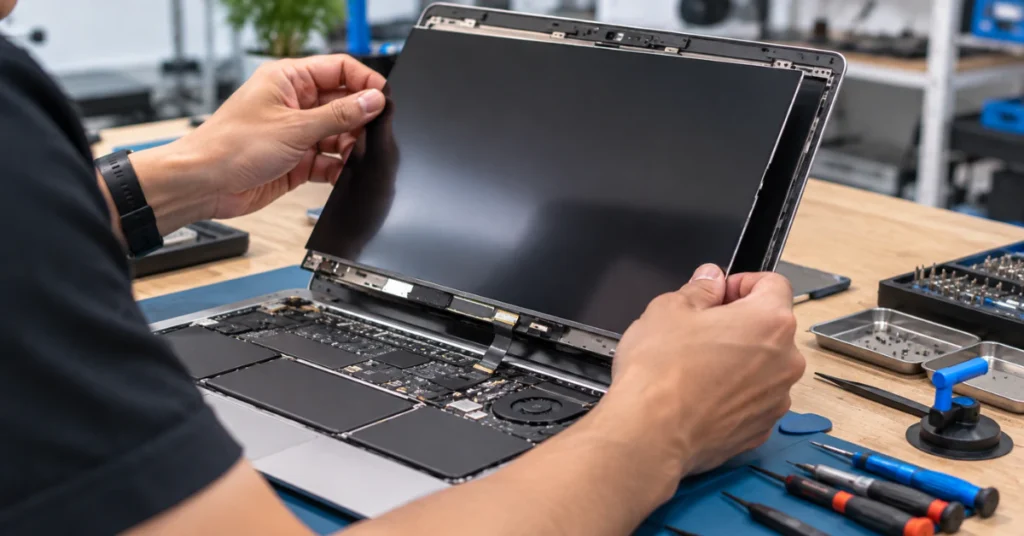
Before we talk numbers, there’s something important to cover first.
Warning: Modern MacBooks use sealed display assemblies. The screen isn’t a part you can safely pop off and swap yourself. Prying one open risks cutting yourself on broken glass, puncturing the battery (which can cause a fire), and it will almost certainly void any warranty or AppleCare+ coverage you still have. This repair needs to go to a professional.
Now, let’s talk about what it actually costs.
If you have AppleCare+
AppleCare+ charges a flat fee per repair, and the amount depends on your MacBook model.
For most Mac models, the fees work like this:
- Screen or outer case damage: $99
- Other accidental damage, including liquid damage: $299
If you have a MacBook Neo, the fees are lower:
- Screen or outer case damage: $49
- Other accidental damage, including liquid damage: $149
So if your pressure damage is just the screen, you’re looking at a flat $99 (or $49 on a Neo) no matter how bad the crack looks. That’s a relief compared to paying full price.
If you don’t have AppleCare+
Without coverage, you’re paying out of pocket, and Apple doesn’t publish one fixed number for this. The cost depends on your exact model, the year it was made, and how much damage there is. Apple will inspect your MacBook in person and give you a real quote before any work starts. It’s worth getting that quote before assuming the worst, since it can vary a lot machine to machine.
Will your home or renters insurance help?
A lot of people hope their renters or homeowners insurance will quietly cover this kind of accident. Unfortunately, that’s usually not the case.
Standard renters and homeowners policies are built to cover specific events, like fire, theft, or burst pipes. Everyday accidents, like a laptop that got crushed in a bag or a drink that spilled on the keyboard, almost always fall outside what these policies pay for. This is called accidental damage, and it’s typically excluded from basic coverage.
So before you call your insurance company expecting a payout, know that you’ll likely be told no. If you want insurance that actually covers drops and spills, you’d need a separate device protection plan built for that purpose, not your regular home policy.
Knowing these numbers ahead of time, both what Apple charges and what your insurance won’t cover, helps you walk into a repair decision with your eyes open instead of getting blindsided by the bill.
Repair vs. Replace: The 5-to-7-Year Rule
If your MacBook is getting up there in age, the repair cost isn’t the only thing to think about. Whether Apple can even fix it matters just as much.
Apple sorts older products into two categories: vintage and obsolete. Here’s what each one means.
A product becomes vintage once Apple has stopped selling that specific model for more than 5 years, but less than 7. At this stage, repairs are still possible, but only if Apple or an authorized repair shop still has the parts in stock. There’s no guarantee.
Once a product passes the 7 year mark since Apple stopped selling it, it becomes obsolete. At this point, Apple stops offering hardware repairs almost entirely. Even authorized repair shops can’t order parts for it anymore. The one exception is batteries, which Apple will still replace on Mac laptops for up to 10 years after the model stopped being sold.
Here’s the part most people miss: this clock starts when Apple stopped selling that model, not when you bought your specific MacBook. So if you bought a MacBook a year or two after it first came out, or picked one up secondhand, it could already be closer to vintage or obsolete status than you’d expect based on your own purchase date.
Why this matters for your decision: if your MacBook is already obsolete, an official Apple screen repair may not even be on the table. You’d be relying on third-party shops using aftermarket parts instead. That’s not necessarily a bad option, but it’s a different conversation than repairing a newer machine through Apple. Before you commit to any repair cost, it’s worth checking where your specific model falls on that timeline first.
Frequently Asked Questions (FAQ)
How do I fix LCD pressure damage?
You can’t fix it yourself. LCD pressure damage is a physical crack or bruise inside the screen, so there’s no software fix. The real fix is a professional screen replacement through Apple or a trusted repair shop.
How do you know if your MacBook screen is damaged?
Check the mark against a few plain color backgrounds first. If it stays in the same spot no matter what’s on screen, that points to the display itself. Then try a screenshot and an external monitor. If the mark doesn’t show up on either, the screen hardware is likely the problem.
How can I fix pressure damage on my laptop screen?
There’s no DIY fix for this, no matter the laptop brand. Stop pressing on the screen, avoid opening and closing the lid more than needed, and get it looked at by a professional. Trying to fix it yourself risks making things worse.
How much does it cost to fix a damaged MacBook screen?
With AppleCare+, it’s a flat $99 fee for most Mac models, or $49 for MacBook Neo. Without coverage, Apple needs to inspect your specific MacBook to give you an accurate quote, since the price depends on the model and the damage.
Is it worth repairing a 7 year old MacBook?
It depends on whether Apple can still service it. Once a model passes 7 years since Apple stopped selling it, it’s considered obsolete and Apple generally won’t repair the screen at all, pushing you toward third-party shops instead.
Should you shut down a Mac every night?
Not really. Apple’s own Mac Help guidance treats closing the lid as simply a way to put your MacBook to sleep. There’s no requirement to fully shut down every night for your screen or your Mac’s health.
Conclusion
A cracked or bruised MacBook screen is never good news, but now you know exactly where you stand. It’s physical damage, not something a reset or update can undo, so there’s no need to keep searching for a software trick that doesn’t exist.
What matters now is simple. Stop pressing on the screen, back up your files while you still can, and get a real quote before deciding between repair and replacement. Whether that means a quick $99 AppleCare+ fix or a harder look at your MacBook’s age, you’re making that call with the full picture instead of guessing.